The image section of the object edit screen.
eZ Image Editor supports editing of the image files supported in Exponential, currently .png, .jpg and .gif files. These will need to be stored in the Media library in the Administration interface. You may also edit image files used in other contexts, like in content objects as articles, galleries and so on. Files not already stored in the Media Library will have to be stored as described in Exponential Media Library.
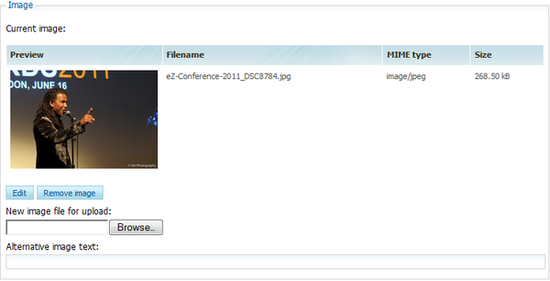
The starting point to edit an image object is to locate the image either in the "Content structure" tab, in the "Media library", or in the "User accounts" tab if you have used images there. When you have located the object that you need to edit, select the "Edit"-button in the Image section of the "Object edit" screen as shown in the screen below. You will see the preview of the image, along with the attributes of the image, the name, the type and size of the object.
The image section of the object edit screen.
Press "Edit" to edit the object. This command will bring you into the eZ Image Editor. Press "Remove image" to remove it from Exponential. To upload a new file select "Choose file" and browse for the file.
Use the "Alternative image text" field when you need a description below your picture in its published state. "Tags" is used when you want to add a tag to the image, which will also be displayed in your web-site's tag cloud. This will make it easy to find tag related images with one click from the tag cloud.
Upon pressing "Edit" in the screen above you will be presented with the Image Editor workspace. The workspace consists of three parts that you may move and position to better fit your needs. In this document the "Actions" part of the Image Editor will be on the left side, and the "Thumbnail" will be on the right side. But you may position these as you see fit.
The workspace is shown in the screen below:
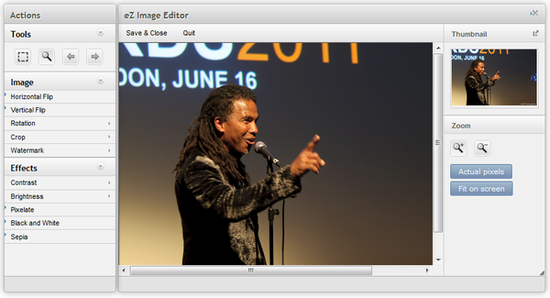
The Image Editor workspace.
When you select the actions on the left side, the right lower part of the workspace will change and display a field with the values you can manipulate or modify.
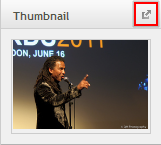
Note: You can also couple/decouple the right part of the Image Editor screen by pressing the "Up arrow" or "Down arrow" next to "Thumbnail". This allows you to put this part of the screen were you find it practical to keep it when you work on an image.
In the "Tools" section of the "Actions" toolbar you find general functions like selecting the part of the image you wish to modify. You also have an "Undo" button to reverse previous actions, and a "Redo" button to redo or reinstate previous actions. The "Zoom" button is used to zoom the picture into a practical size to work with.
In the "Image" section of the "Actions" toolbar you will find the tools to modify the image. Here there are functions to flip, rotate and crop your image, as well as to copy watermarks into your image.
In the "Effects" section of the "Actions" toolbar you will find filters and image adjustments to put effects into your image by modifying the image attributes. Adjustments include modifying the "Contrast", Brightness" and "Black and White" attributes, and filters include blending the pixels into each other with "Pixelate" and make an aging effect with "Sepia".
When you select the actions on the left side, the right lower part of the workspace will change and display a field with the values you can manipulate or modify. You either drag the handle in the bar or enter the exact value for the adjustment you wish to make. An example of this would be to select "Contrast" under "Effects" in the "Actions" menu.
The lower right part of the workspace will now change as shown in the screen below:
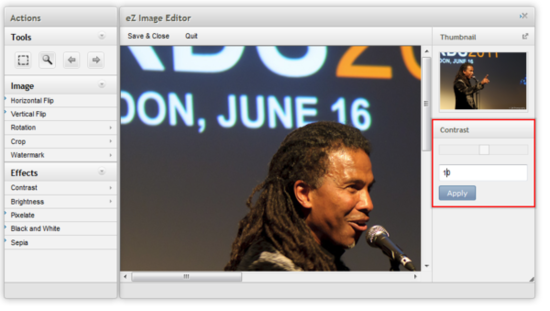
Example of how to do adjustments in the Image Editor.
Press "Apply" to confirm that the contrast value is changed from 0 to 10. You can also drag the handle bar to the contrast value you would like. All functions will work more or less like the description above, but are nonetheless described in more detail in the paragraphs where the functions are described.
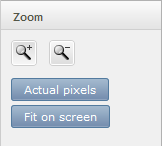
Select the size of the image you wish to edit by using the Zoom function. In the right part of the screen you will find two zooming options, "Actual pixels" or "Fit on screen":
Note: Note that you may zoom to the exact size you wish to work with by selecting the magnifying glass in the "Tools" section of the "Actions" toolbar.
See the screen below:
Using the zoom-function in "Tools"
Select the part of the image you wish to work with in "Tools"-"Select". The tool for marking parts of the screen will appear. You may now either use that tool to select, or you can enter values in the "Dimensions" field on the lower right part of your Image Editor screen:
There are 3 ways of turning your image in the Image Editor:
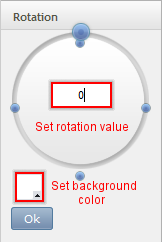
Set rotation value and background color
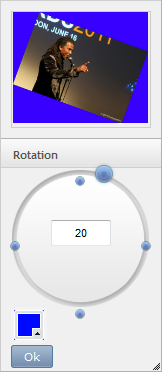
The Thumbnail shows the rotated image with the background color
Select "Watermark" when you need to enter a watermark to your image to prevent copying and illegal reuse of your images. In the lower right corner you will get the list of watermarks that you have added to the system. Select the watermark and press "Apply". The watermark is now copied to your image. Use the grid to specify where in the image you want the watermark to be located.
Note: Watermarks are copied into the system during the installation. Follow this link to see how to add new watermarks to the existing set of watermarks.
Select "Contrast" under "Effects" in the "Actions" menu. The lower right part of the workspace will now show a field were you enter the exact contrast value, or simply drag the handle to the contrast level you want. Press "Apply" to confirm that the contrast value is changed.
See the screen below for how to adjust the contrast
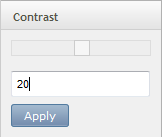
Adjusting the contrast by entering the exact number
Select "Brightness" under "Effects" in the "Actions" menu. The lower right part of the workspace will now show a field were you enter the exact brightness value, or simply drag the handle to the contrast level you want. Press "Apply" to confirm that the contrast value is changed. See the screen below for how to adjust the brightness.
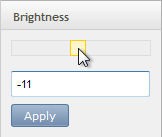
Adjusting the brightness by using the handle bar
You can enter two types of filters to your image: a filter to blur your image and a filter to get an aging effect on the image.
Simply click "Black and White" to turn your colored image into a black and white one.
Save the modified image by clicking "Save and Close". If you choose the command "Quit" you will quit the Image Editor without saving the document you were working on.
Powered by Exponential™ CMS Open Source Web Content Management. Copyright © 1999-2013 eZ Systems AS (except where otherwise noted). All rights reserved.